🎉 Introduction
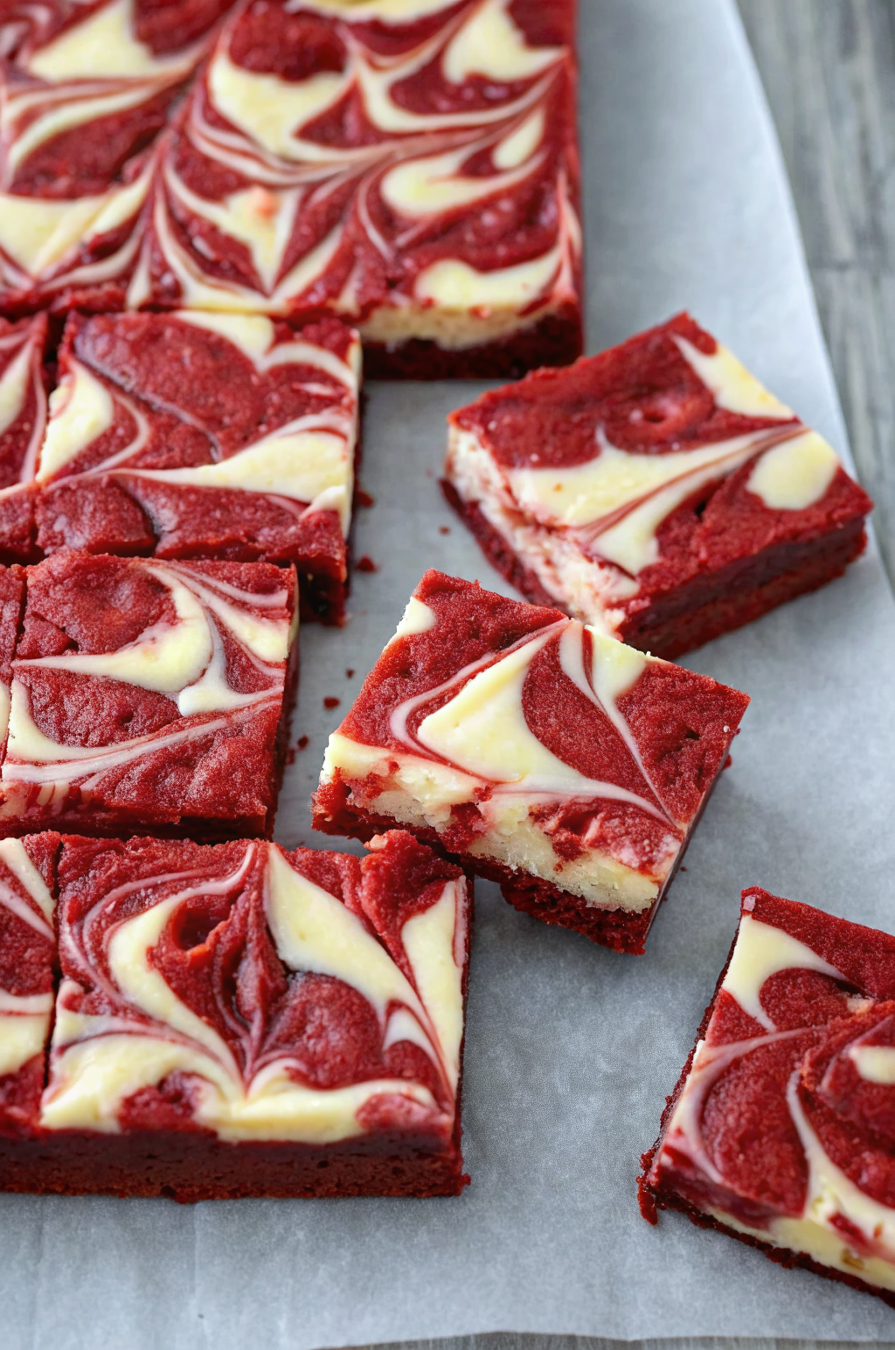
When red velvet meets cheesecake and brownies, the result is pure dessert magic. These Red Velvet Cheesecake Brownies combine a deeply fudgy red velvet base with a silky cream cheese swirl, creating a stunning layered treat that’s rich, soft, and irresistibly indulgent.
Perfect for holidays, Valentine’s Day, celebrations, or anytime you want a dessert that looks bakery-level but is surprisingly easy to make at home, these brownies deliver on both flavor and presentation. The cocoa-kissed red velvet layer brings subtle chocolate depth, while the cheesecake swirl adds tangy creaminess that balances every bite.
If you’re craving fudgy brownies, cheesecake desserts, or a show-stopping red velvet treat, this recipe deserves a spot at the top of your baking list.
🧰 Equipment Needed
- Mixing bowls (large and medium)
- Electric mixer or hand whisk
- Rubber spatula
- Measuring cups and spoons
- Square baking pan
- Parchment paper
- Offset spatula or knife
- Cooling rack
🛒 Ingredients
For the Red Velvet Brownie Layer
- 1 cup all-purpose flour
- ¼ cup unsweetened cocoa powder
- ¼ teaspoon salt
- ½ cup unsalted butter, melted
- ¾ cup granulated sugar
- ¼ cup brown sugar
- 2 large eggs
- 1 teaspoon vanilla extract
- Red gel food coloring (as needed)
For the Cheesecake Swirl
- 8 oz cream cheese, softened
- ¼ cup granulated sugar
- 1 large egg
- ½ teaspoon vanilla extract
👩🍳 Directions
Step 1: Prepare the Pan
Preheat your oven to 175°C (350°F).
Line a square baking pan with parchment paper, leaving an overhang for easy removal.
Step 2: Mix the Dry Ingredients
In a medium bowl, whisk together the flour, cocoa powder, and salt. Set aside.
Step 3: Make the Red Velvet Batter
In a large bowl, whisk the melted butter, granulated sugar, and brown sugar until smooth.
Add the eggs one at a time, mixing well after each addition. Stir in the vanilla extract and red food coloring until the batter reaches a deep red color.
Gradually fold in the dry ingredients until just combined. Do not overmix to keep the brownies fudgy and tender.
Step 4: Prepare the Cheesecake Layer
In a separate bowl, beat the cream cheese until smooth. Add sugar, egg, and vanilla extract. Mix until creamy and lump-free.
Step 5: Assemble the Brownies
Pour about ¾ of the red velvet brownie batter into the prepared pan and spread evenly.
Spoon the cheesecake mixture over the brownie layer in dollops. Add the remaining brownie batter on top in small spoonfuls.
Use a knife or skewer to gently swirl the layers together, creating a marbled effect.
Step 6: Bake
Bake for 35–40 minutes, or until the center is just set and a toothpick inserted comes out with a few moist crumbs.
Step 7: Cool Completely
Allow the brownies to cool fully in the pan before lifting them out and slicing. This ensures clean layers and perfect texture.
🍽️ Servings & Timing
- Servings: 12–16 brownies
- Prep Time: 20 minutes
- Bake Time: 35–40 minutes
- Cooling Time: 1 hour
- Total Time: About 2 hours
Ideal for slicing into neat, bakery-style squares.
🧊 Storage & Reheating
Storage
- Store in an airtight container in the refrigerator for up to 4 days
Freezing
- Freeze sliced brownies for up to 2 months
- Thaw at room temperature before serving
Reheating
- Not recommended; best enjoyed chilled or at room temperature
🥄 Variations
- Extra Cheesecake: Increase the cheesecake layer slightly
- Thicker Brownies: Use a smaller pan
- Mini Squares: Slice into bite-size cubes for dessert platters
- Decorative Swirl: Create heart-shaped swirls for special occasions
- Deeper Color: Use gel coloring for vibrant red velvet tone
❓ 10 FAQs
- Are these brownies very sweet?
They’re rich but balanced by the cheesecake layer. - Do they taste like chocolate brownies?
They have mild cocoa flavor typical of red velvet desserts. - Why cool completely before slicing?
It helps set the layers cleanly. - Can I make them ahead of time?
Yes, they taste even better the next day. - Can kids help make this recipe?
Yes, especially with swirling the layers. - Why use gel food coloring?
It gives bold color without thinning the batter. - Can I double the recipe?
Yes, bake in a larger pan and adjust time. - Do these brownies need frosting?
No, the cheesecake swirl is enough. - Can I skip the swirl?
Yes, but the swirl adds visual appeal. - What makes these brownies special?
Their fudgy texture, creamy cheesecake layer, and red velvet color.
🏁 Conclusion
These Red Velvet Cheesecake Brownies are the perfect fusion of three beloved desserts into one unforgettable treat. Rich, creamy, and beautifully layered, they’re ideal for celebrations or whenever you want a dessert that feels truly special.
Once you make them, don’t be surprised if they become your most-requested brownie recipe.
Red Velvet Cheesecake Brownies – Fudgy Layers with a Creamy Swirl
Ingredients
✨ Kitchen Essentials You’ll Love
Quick picks I trust for better results, faster prep, and easier cleanup.
-
🍳View ↗
Lodge Seasoned Cast Iron Skillet
-
⚡View ↗
Instant Pot Duo Plus 9-in-1 Electric
-
🔥View ↗
CHEFMAN Digital Air Fryer XL 10L
Disclosure: As an Amazon Associate, I earn from qualifying purchases at no extra cost to you.
Equipment
Method
- Preheat your oven to 175°C (350°F).
- Line a square baking pan with parchment paper, leaving an overhang for easy removal.
- In a medium bowl, whisk together the flour, cocoa powder, and salt. Set aside.
- In a large bowl, whisk the melted butter, granulated sugar, and brown sugar until smooth.
- Add the eggs one at a time, mixing well after each addition. Stir in the vanilla extract and red food coloring until the batter reaches a deep red color.
- Gradually fold in the dry ingredients until just combined. Do not overmix to keep the brownies fudgy and tender.
- In a separate bowl, beat the cream cheese until smooth. Add sugar, egg, and vanilla extract. Mix until creamy and lump-free.
- Pour about ¾ of the red velvet brownie batter into the prepared pan and spread evenly.
- Spoon the cheesecake mixture over the brownie layer in dollops. Add the remaining brownie batter on top in small spoonfuls.
- Use a knife or skewer to gently swirl the layers together, creating a marbled effect.
- Bake for 35–40 minutes, or until the center is just set and a toothpick inserted comes out with a few moist crumbs.
- Allow the brownies to cool fully in the pan before lifting them out and slicing. This ensures clean layers and perfect texture.
Notes
They’re rich but balanced by the cheesecake layer. Do they taste like chocolate brownies?
They have mild cocoa flavor typical of red velvet desserts. Why cool completely before slicing?
It helps set the layers cleanly. Can I make them ahead of time?
Yes, they taste even better the next day. Can kids help make this recipe?
Yes, especially with swirling the layers. Why use gel food coloring?
It gives bold color without thinning the batter. Can I double the recipe?
Yes, bake in a larger pan and adjust time. Do these brownies need frosting?
No, the cheesecake swirl is enough. Can I skip the swirl?
Yes, but the swirl adds visual appeal. What makes these brownies special?
Their fudgy texture, creamy cheesecake layer, and red velvet color. 🏁 Conclusion These Red Velvet Cheesecake Brownies are the perfect fusion of three beloved desserts into one unforgettable treat. Rich, creamy, and beautifully layered, they’re ideal for celebrations or whenever you want a dessert that feels truly special. Once you make them, don’t be surprised if they become your most-requested brownie recipe.