Ingredients
✨ Kitchen Essentials You’ll Love
Quick picks I trust for better results, faster prep, and easier cleanup.
-
🍳View ↗
Lodge Seasoned Cast Iron Skillet
-
⚡View ↗
Instant Pot Duo Plus 9-in-1 Electric
-
🔥View ↗
CHEFMAN Digital Air Fryer XL 10L
Disclosure: As an Amazon Associate, I earn from qualifying purchases at no extra cost to you.
Equipment
Method
Step 1: Place the softened cream cheese in a large mixing bowl and stir until smooth and creamy.
Step 2: Add the shredded cheddar cheese, lemon zest, salt, and black pepper to the bowl and mix until fully combined.
Step 3: Stir in the soy sauce and vinegar mixture, mixing gently until the flavor is evenly distributed throughout the cheese mixture.
Step 4: Cover the bowl and refrigerate the mixture for 20–30 minutes so it firms up slightly and is easier to shape.
Step 5: Remove the chilled cheese mixture from the refrigerator and scoop out small portions using a spoon or cookie scoop.
Step 6: Roll each portion between your hands to form smooth, round mini cheese balls.
Step 7: Place the cheese balls on a serving platter or tray lined with parchment paper.
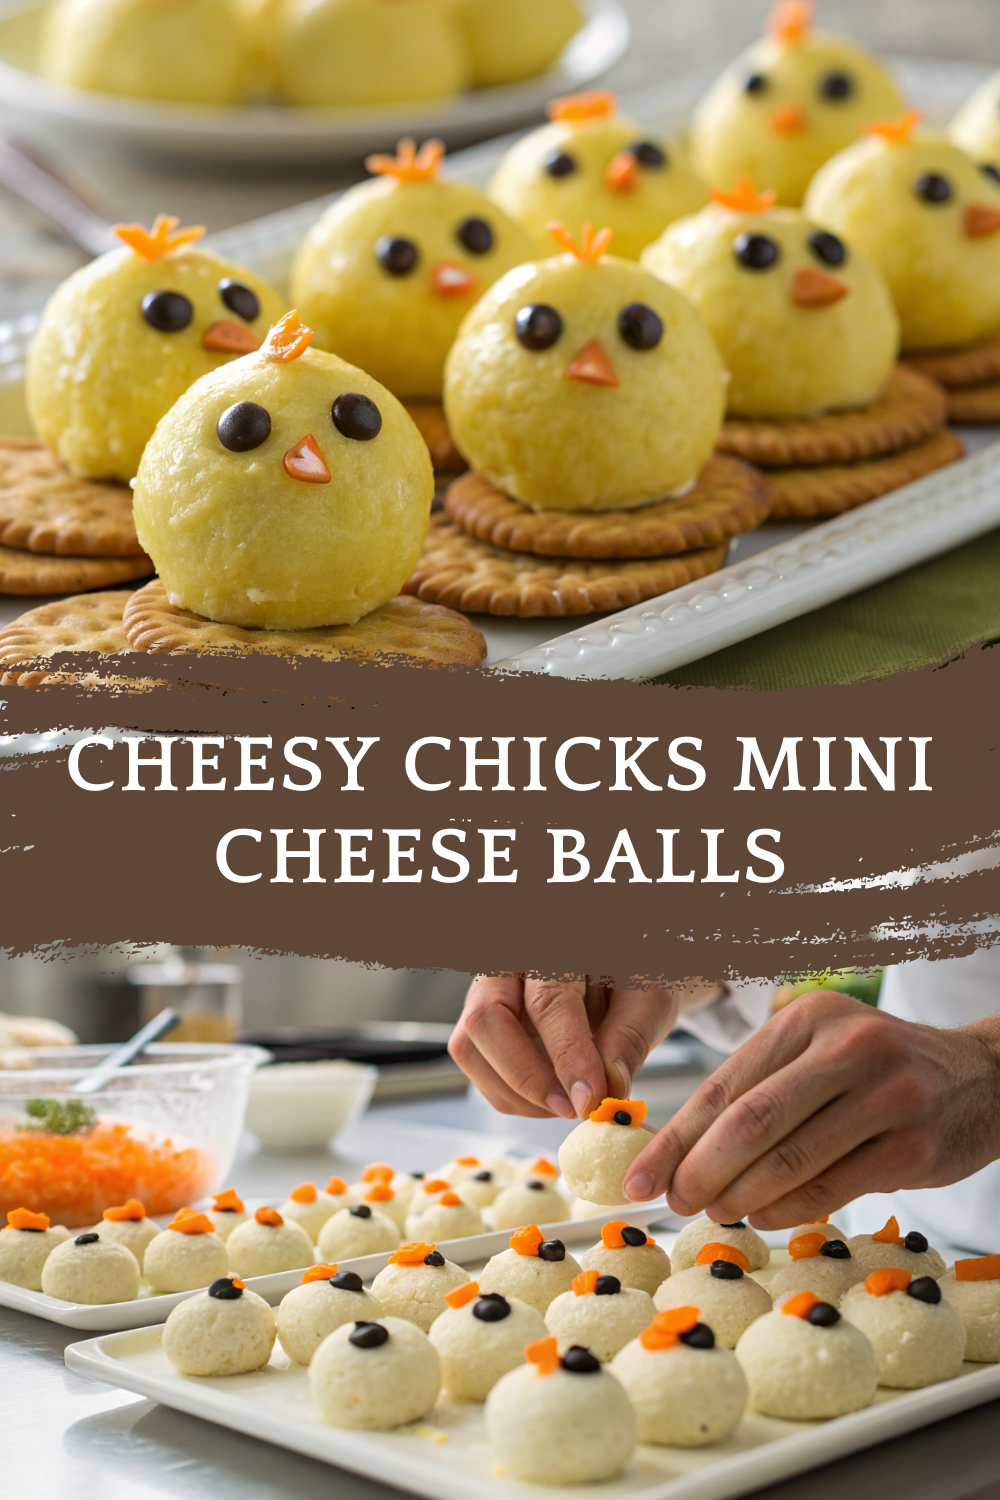
Step 8: Cut carrot rounds into small triangle shapes for beaks and slightly larger pieces for feet.
Step 9: Press two small slices of black olive into each cheese ball to form eyes.
Step 10: Gently insert a carrot triangle below the eyes to create the beak, and place carrot pieces at the bottom to resemble feet.
Step 11: Repeat until all cheese balls are decorated as little chicks.
Step 12: Refrigerate the finished cheese balls for at least 15 minutes before serving to help them hold their shape.
Notes
🧊 Storage & Reheating
Storage Store in an airtight container in the refrigerator for up to 3 days Reheating Not recommended; these appetizers are best served chilled or at cool room temperature 🥄 Variations
Have fun customizing these cheesy chick appetizers: Extra Cheesy: Add a mix of mild and sharp cheddar Herb Boost: Mix in finely chopped parsley or chives Spicy Touch: Add a pinch of paprika or mild chili powder Different Shapes: Turn them into bunnies or eggs for variety Kid-Friendly Version: Keep seasoning mild and simple ❓ 10 FAQs Can I make these ahead of time?
Yes, they can be prepared a day in advance and refrigerated. Why chill the cheese mixture before shaping?
Chilling helps the cheese balls hold their shape better. Can I use pre-shredded cheese?
Yes, but finely shredded cheese blends more smoothly. Are these suitable for kids?
Absolutely, kids love the fun shapes and mild flavor. Can I freeze mini cheese balls?
Freezing is not recommended due to texture changes. What can I use instead of olives for eyes?
Peppercorns or tiny pieces of vegetables work well. Do these melt at room temperature?
They soften slightly, so keep them cool until serving. Can I make them larger?
Yes, but mini sizes are easier to decorate and serve. What crackers pair best with these?
Plain round crackers highlight the cheese flavor best. Are these good for themed parties?
Yes, they’re perfect for Easter and spring themes. 🏁 Conclusion
These Cheesy Chicks Mini Cheese Balls combine playful design with rich, creamy flavor, making them a standout addition to any Easter or spring celebration. Easy to prepare, fun to decorate, and loved by all ages, they prove that appetizers can be both delicious and delightful. If you want a festive snack that brings smiles before the main meal, this recipe is a guaranteed success.