Ingredients
✨ Kitchen Essentials You’ll Love
Quick picks I trust for better results, faster prep, and easier cleanup.
-
🍳View ↗
Lodge Seasoned Cast Iron Skillet
-
⚡View ↗
Instant Pot Duo Plus 9-in-1 Electric
-
🔥View ↗
CHEFMAN Digital Air Fryer XL 10L
Disclosure: As an Amazon Associate, I earn from qualifying purchases at no extra cost to you.
Equipment
Method
Step 1: Mix the Dough
- In a large bowl, whisk together flour, salt, and yeast.
- Pour in warm water and stir until a shaggy, sticky dough forms.
- No need to knead — just mix until fully combined.
Step 2: Cover & Rest
- Cover the bowl with a clean kitchen towel or plastic wrap.
- Let the dough rest at room temperature for 12–18 hours.
- This slow fermentation develops flavor and structure — time does the kneading for you!
Step 3: Shape the Dough
- After the rest, the dough will be bubbly and soft.
- Lightly flour a surface and your hands.
- Turn the dough out and gently fold it a few times into a ball — no hard kneading needed.
Step 4: Final Rise
- Place dough seam-side down on parchment paper.
- Cover loosely and let rise for 30–60 minutes, until slightly puffed.
Step 5: Preheat the Oven
- Place your Dutch oven with the lid on in your oven.
- Preheat to 450°F (230°C) during the final dough rise (for at least 30 minutes).
- A preheated Dutch oven gives the bread its signature crust — steam + high heat = magic.
Step 6: Score and Bake
- Carefully remove hot Dutch oven and take off the lid.
- Use parchment to transfer dough into the pot.
- Score the top with a sharp knife or blade (a shallow “X” or slash helps it expand).
- Cover and bake for 30 minutes.
- Remove lid and bake 10–15 more minutes, until deeply golden and crackling.
Step 7: Cool
- Remove bread from the pot and let cool on a wire rack.
- Wait at least 30 minutes before slicing (resist the urge!).
Notes
🧊 Storage & Reheating
Room Temperature:
Store in a paper bag or wrapped in a kitchen towel for up to 3 days. Avoid plastic — it softens the crust.
Freezer:
Freeze whole or sliced in an airtight bag for up to 3 months.
Reheat slices in toaster or thaw and warm loaf at 350°F for 10 minutes.
🥄 Variations
Herb Loaf: Add 1 tsp dried rosemary or thyme to the dough.
Cheese & Jalapeño: Fold in ½ cup shredded cheddar and 1 sliced jalapeño before final rise.
Olive Loaf: Add ½ cup chopped olives + 1 tsp oregano.
Whole Wheat: Replace 1 cup of flour with whole wheat flour.
Seeded Crust: Roll shaped dough in sesame, flax, or sunflower seeds before baking.
❓ 10 FAQs
Can I use active dry yeast?
Yes. Just make sure to stir it into the flour — no need to dissolve it first. What’s the difference between no-knead and traditional bread?
No-knead relies on time and moisture to build gluten, rather than kneading by hand. Why a Dutch oven?
It traps steam, which gives the bread a crispy crust and great oven spring. Can I bake this without a Dutch oven?
Yes — use an oven-safe pot with a lid, or bake on a pizza stone with a pan of hot water below for steam. Can I use whole wheat flour?
Up to 1 cup whole wheat flour can be substituted — more than that will yield a denser loaf. How do I get a shiny crust?
Steam and a hot oven do the trick. Letting the bread cool completely also helps. Can I make this gluten-free?
No-knead recipes don’t convert easily to gluten-free — try a recipe made specifically for GF flour. How do I make it faster?
Increase yeast to ½ tsp and rise for 4–6 hours. The flavor will be less complex but still delicious. Can I use sourdough starter instead of yeast?
Yes! Use ½ cup active starter and reduce water slightly. Ferment as usual. Why is my bread gummy?
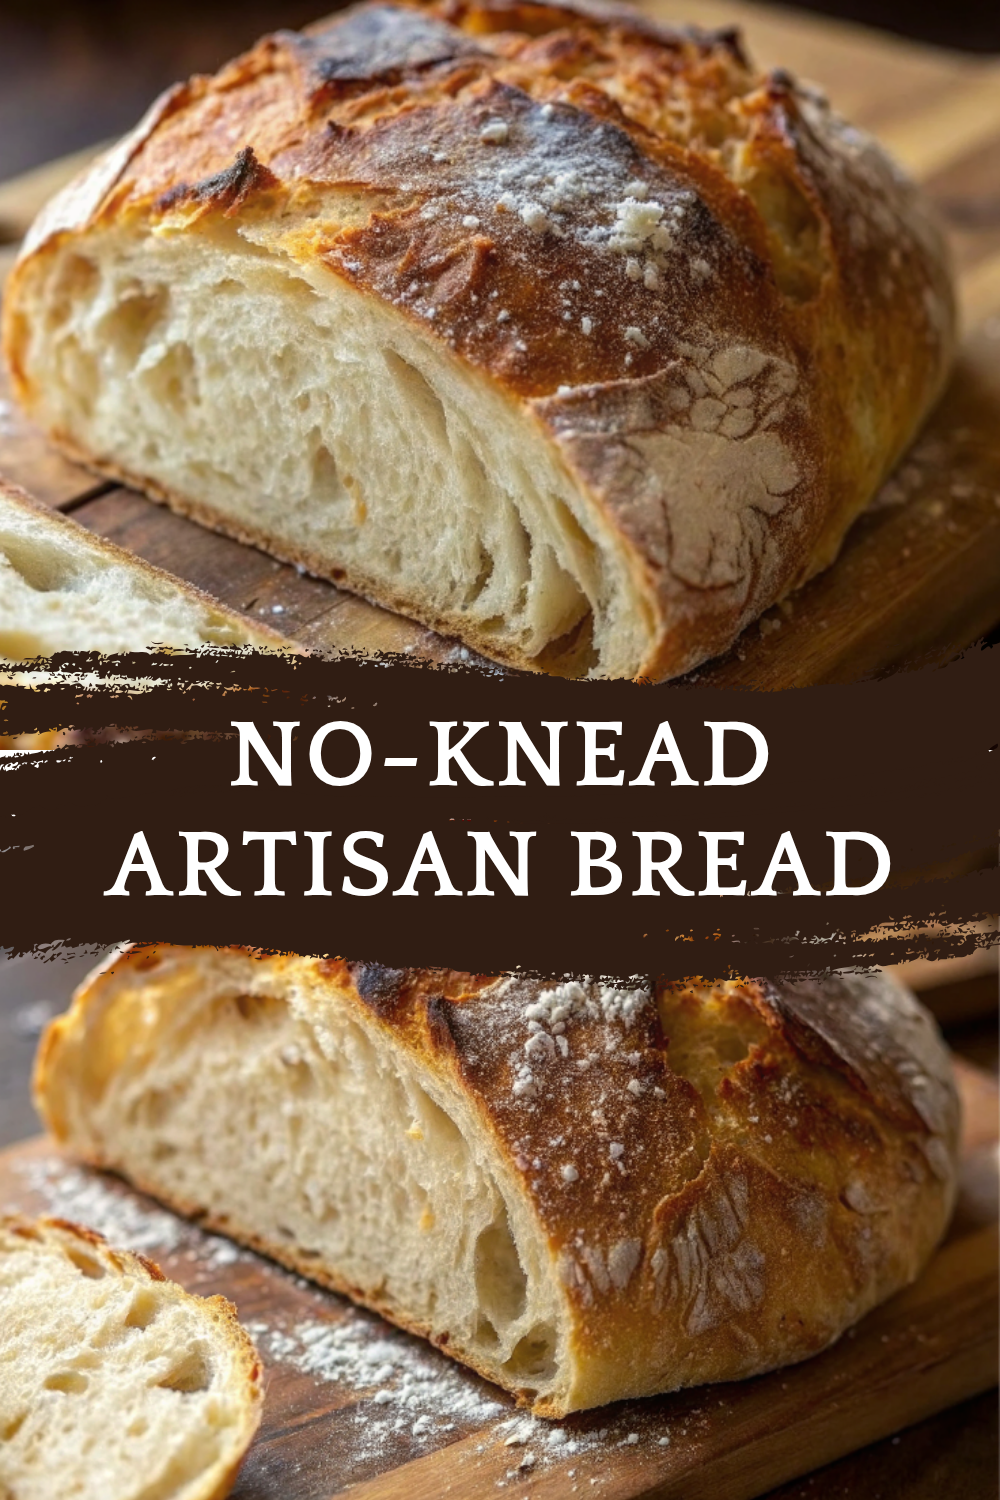
It may not be fully baked. Check internal temp — it should be 200–210°F. 🏁 Conclusion This No-Knead Artisan Bread Recipe is proof that you don’t need fancy ingredients, equipment, or skill to bake stunning bread. With 4 ingredients and zero kneading, you’ll produce a loaf with bakery-quality crust, a tender interior, and deep flavor thanks to the long rise. Whether you're making toast, serving a soup companion, or slicing it warm for a snack — this is the ultimate beginner bread recipe. Once you try it, you'll want to bake it every weekend (and we don't blame you). No stress. No kneading. Just pure bread magic.
Yes. Just make sure to stir it into the flour — no need to dissolve it first. What’s the difference between no-knead and traditional bread?
No-knead relies on time and moisture to build gluten, rather than kneading by hand. Why a Dutch oven?
It traps steam, which gives the bread a crispy crust and great oven spring. Can I bake this without a Dutch oven?
Yes — use an oven-safe pot with a lid, or bake on a pizza stone with a pan of hot water below for steam. Can I use whole wheat flour?
Up to 1 cup whole wheat flour can be substituted — more than that will yield a denser loaf. How do I get a shiny crust?
Steam and a hot oven do the trick. Letting the bread cool completely also helps. Can I make this gluten-free?
No-knead recipes don’t convert easily to gluten-free — try a recipe made specifically for GF flour. How do I make it faster?
Increase yeast to ½ tsp and rise for 4–6 hours. The flavor will be less complex but still delicious. Can I use sourdough starter instead of yeast?
Yes! Use ½ cup active starter and reduce water slightly. Ferment as usual. Why is my bread gummy?
It may not be fully baked. Check internal temp — it should be 200–210°F. 🏁 Conclusion This No-Knead Artisan Bread Recipe is proof that you don’t need fancy ingredients, equipment, or skill to bake stunning bread. With 4 ingredients and zero kneading, you’ll produce a loaf with bakery-quality crust, a tender interior, and deep flavor thanks to the long rise. Whether you're making toast, serving a soup companion, or slicing it warm for a snack — this is the ultimate beginner bread recipe. Once you try it, you'll want to bake it every weekend (and we don't blame you). No stress. No kneading. Just pure bread magic.